buriedinscraps

Decide what to be and go be it.

Archive for the tag “summer list”

Another one bites the dust!

I’m beginning to love that song!

quiltYes!!  I have another finished project.  I purchased this pattern about a year ago.  I put it on the back burner for a while.  I guess I lit a fire under that burner when I decided I wanted to learn wool applique.  I added the last border on my own.  I didn’t think it looked finished without it.  I like it very much!!

quiltingHere’s a close-up of my quilting on this piece.  I used a stencil for this corner.  I didn’t trust myself to do this free-hand.  If you click on the picture you can see my freehand leaf border.  Now, that’s something I like!!  I have the leaf design down pretty good!

pumpkinAnd here’s my first  attempt at wool applique.  I learned something while stitching this.  I didn’t know that perle cotton came in different weights.  I know it now!  This was like stitching with a rope.  I’m sure it would have been easier and the stitching finer if I had used lighter weight perle cotton.  Ah well!  Live and learn!  I’m just glad I didn’t learn it on my Noah’s Ark project I plan to begin shortly.  I’m going to a new quilt shop Saturday.  I’ve called ahead and found that they carry Valdani perle cotton in various weights!  So, that’s next on my list!

Two unfinished projects now finished!  Whoohoo!!!!!

The quilt whisperer…

Maybe some of you remember this quilt….

This is my Civil War tribute quilt that I was too cowardly to quilt myself.  My fmq skills were nowhere near where they needed to be to wrestle with this guy.  Besides, I just wasn’t confident enough to tackle it no matter what size it was!  I cried “Uncle” and decided to have it quilted by a local long arm quilter.

I was pretty nervous about leaving my “baby”.  I felt like I did when I left my son at college for the first time.  (Although I don’t think I had to worry about my quilt walking on the wild side!)  I was apprehensive to say the least.

One of the biggest reasons I did not quilt this myself is that I’m design challenged when it comes to quilting.  I never know how to begin…I never know where to put which motifs…or if I should put a motif at all!  That’s why I end up stippling or meandering or some such thing.  I feel it’s better to wander than to have to live with botched florals for all eternity!  I looked at that quilt and I had  no idea what to do with it.  So I put myself on the waiting list for the long arm quilter.

The day finally came when I was to take my baby to camp and leave it.  I “dethreaded” it, pressed it, pressed the backing, hung it on a hanger and left for the quilter.  When I arrived at her house she asked me about how I would like it quilted.  I told her I had no idea.  She spread the quilt out and looked at it and ran her hands over it and started to tell me how she would quilt it.  I was stunned when she finished…it was exactly what I wanted…except I didn’t know it until she told me!  It was like the quilt told her how it should be finished.  I’ve seen shows on television about dog whispers and horse whisperers.  I think she must be a quilt whisperer! ( Wouldn’t that be an awesome show!)

Here’s the sort of finished product.  Sort of finished because it still needs the binding.  And I think I’ve documented pretty well just how much I hate love to attach binding.  But it will be finished soon…our guild’s show is early October.

Each block is quilted individually with designs where they were appropriate….some with feathers, some not.  There’s a viney, leafy design in the sashing and the border is quilted with straight lines to give the illusion of a pieced border.  She used three thread colors….something I wouldn’t do…I have enough trouble using one!  She thought that the thread shouldn’t overpower the blocks.  I liked the subtlety of that.

Enjoy my  little slideshow of some of the blocks.  Ah…to quilt like that………………………

This slideshow requires JavaScript.

Another one finished….

First off….I’m going to apologize in advance. I’m posting this from my IPad and it likes to put words in my mouth. I ticked another project off my summer to-do list. I finished my charity quilt. My sister and I have been making lap quilts for the veteran’s home. While my top has been finished for a while, I put a off quilting it. I wanted to put it on my Hinterburg frame with my Juki TL 98. I have a love/hate relationship with this set-up. When it works, it’s great! When it doesn’t it’s a nightmare. I’ve had more nightmares than sweet dreams. Because of this, I stopped using it. I decided to give it another chance. Loaded up the quilt. That was an adventure in itself since I forgot how to do it. Got it loaded up and fired up the machine. Guess what! It worked beautifully. I was finished in two and a half hours. Only had a small tension problem that was easily fixed. I only did a meandering design to eliminate any extra pressure!

After I bound the quilt, I tossed it into the washing machine. When I pulled it out, I saw that one of the reds had run. Dang! That hadn’t happened to me in years! See what happens when you become complacent? My sister and I worked on the next charity quilt. Didn’t make the progress we had hoped.  But that’s another post for another day!

Better late than never….

I’ve moved from the corner and put the dunce cap away for another day and as promised, here are my words of wisdom!  🙂

I’ve crossed another project off of my summer to-do list!

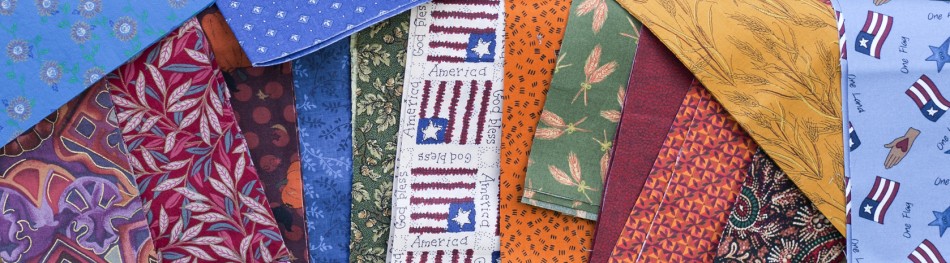
This one was truly a learning experience.  As you can probably tell by the fabrics, this one has been patiently languishing waiting in the Later Tater pile for quite some time.  It was a pattern that caught my eye but I quickly lost interest in it.  I nearly tossed it recently but I thought it would be good fmq practice.  Originally, I was going to do Leah’s “zippling” but I thought it better lended itself to curvy stippling.  I’ve never known what to do with applique shapes.  Do I quilt over them or quilt around them or just not do them.  Usually I opt for Plan C.

I decided to use the quilting to enhance the appliques.  First, let me tell you that these are fused onto the background.  They will survive a nuclear blast.  I have no idea which fusible I used back in my dark days of beginning applique but just know that quilting through that fusible was like quilting through armor.  I’m older and wiser now (older for sure!).  Now I would cut out the center of the fusible.  Makes for a much softer quilt and I’m sure much easier quilting!  But I plugged along willing the needle to not break in the hot mess that was my fusible!

I then decided that stippling would be the way to go on the background.  After all, I had this beautiful hand-dyed Valdani thread that was perfect.  It was perfect and it quilted beautifully.  I just want to know whose big idea it was to stipple so small.  I thought I would never finish.

Ah…the border.  Finally the border!  I saw the light at the end of the tunnel.  Borders always stymie me.  I’m sure you’ve all been there.  It’s the border…I want to be finished!  And many times it’s a plain piece that cries out for fancy stitching!  Well, borders can cry me a river because I typically just quilted a grid or straight lines.  I thought since this was fmq practice, a leafy border might look nice.  And I think it does.  And it was easy!  I’m glad I didn’t take the easy way out.

I’ve tried to fmq without the gloves.  I don’t like the gloves.  They’re bulky and they can get hot and I sew through them at least once a day.  But I can’t get a good grip without them.

My sister took a fmq class and the instructor suggested using glycerine.  You just rub a few drops onto your fingertips and it’s amazing how well you can grip the fabric.  When I first tried it I was skeptical.  It had an almost greasy texture and I was terrified that it would rub off on my quilt.  It didn’t.  In fact, it didn’t wear off of my fingers until I washed it off.  If you have the same issues with the gloves that I do, give this a try.

And here’s the tease….

I’ll be in Florida visiting my son and my sister next week and these guys are going along for the ride.  My sister and I will spend a day putting together a nine-patch for a charity quilt  project that we have.  I’ll post a photo of the finished project later!

Guess what I did….

I had a wonderful post planned for today….a finished project, a “tool tip”  and a tease.  I edited all of the photos on my computer downstairs and brought them into WordPress.  I carefully thought out the tidbits of wisdom that I was going to share with you later on this evening.  Then I exited the program and forgot to save the changes!  Isn’t that basic computer knowledge….save, save, save!  So, here I am upstairs on the laptop with words to type and wisdom to share and no photos and too lazy to start over tonight!  Darn I hate when that happens.

Here’s me wearing the dunce cap!! Not the first time either I might add!

I guess it will all have to wait until tomorrow.   🙂

Another one bites the dust!

And I’m so glad it did!  I’m checking one more off my summer to-do list!  I finished the quilt I call Square Cubed. I call it that because it’s basically a Square Within a Square block that I extended to have three squares.  I really like this little quilt.  I’m sure you’ll remember the fabrics…the little guys that wouldn’t talk to me.  Piecing the quilt was easy once I decided what I wanted to do.  But as always, I was drawing a blank when it came to quilting it.  I have the hardest time deciding how to quilt my quilts.  I almost never want anything “straight” or grid-like.  But I also don’t always want a stipple or all over design.  I’m usually stumped when it comes to motifs or quilting plain blocks.  This quilt had many opportunities to show off quilting.  However, I’m not sure showing off is a good thing for someone who still has so much to learn.  But here are a few pictures of the end result!

I stitched in the ditch around the blocks and inside the pieced blocks.  I wanted something rounder and smoother for the center, so I chose a spiral.  I have to say they were fun to do and pretty easy.  I had a lot of practice with spirals by the time I was finished!

What to do with the plain blocks.  My original thought was to do a plume in these blocks and feathers in the borders.  After I looked at the borders, I decided that they really weren’t wide enough for my current feathers.  Maybe in the near future I can make them small enough to fit in a smaller border but right now I’m like those big semis you see on the road…I make wide turns!  So I chose one of Leah’s fill patterns…Bubble Wand…and used it in the plain blocks and on the border.  Lots of practice with circles and travelling.  I think that it may also help me with feathers.  It seems like a good jumping off place for them.  The picture above shows my inner border and some of the outer border.

I was merrily stitching along…my fmq looking pretty darn good if I do say so myself!  I made the mistake of turning the quilt over.  Oh dear!  I had eyelashes on the back.  I know that quilting circles and curves can breed eyelashes.  I made the decision to not unsew.    Moved on the next bunch of circles and slowed down a bit and was careful about making the curves.  I was feeling pretty smug.  Turned it over and….more eyelashes!  I had enough eyelashes on the back of that quilt to film an episode of Jerseylicious!  Click on the picture below to get a real good look at the mess!

Dang!  Now what!  I’m not giving up and I am finishing this quilt!  Checked the needle, the thread, feed dogs.  Everything seemed fine.  The only thing left was to check the tension.  (Insert blood curdling scream here.)  I really don’t like to fool with tension.  A few weeks back, I spent an afternoon getting the tension just right.  Then I wrote down the number and thought my tension issues were over.  Wrong.  I readjusted the tension and after a few practice spirals, I found the right tension….again.  And then things went smoothly for me.

This is what good tension looks like.  🙂  I guess this quilting thing is a constant learning curve.  Just when you think you know it all…you learn something else!

Here’s the finished project.  Now I’m on to the next one.  It feels so good to have finished a couple of quilt tops that have been languishing on my sewing room.  Finishing is good…..

One down…

…and a bunch to go!  But I’ve checked one project off my Summer To-Do list.  My Gettysburg Sun is finished!  Finally…    I know I’ve whined about it a little bit…OK, a lot.  But I finally finished it and took a step back and it actually doesn’t look too darn bad!  It’s amazing how some imperfections disappear with a good night’s sleep.  Having said that, I did “unsew” a few places.  No amount of sleep would have saved those “straight” lines!  Let’s just say, I’m glad the quilting police couldn’t pull me over.  I’d be doin’ time in the slammer!  So, here’s the finished product.

The finished product! 

I think the part I’m proudest of is the green border.  When I began the project and was full of optimism and enthusiasm, I decided to quilt a loopy design in that border.  As my enthusiasm waned, I thought I just might take the easy way out and leave it plain.  After all, it was only an inch or so wide.  But I convinced myself to stick to the plan.  If nothing else, it would be loopy practice. Although, believe me when I tell you that I’ve  had plenty of practice at being loopy!  Here’s my simplistic little border that I’m so proud of.  Not so much the workmanship itself, but the fact that I did it at all!

My loopy border!

The issues I had with quilting straight lines were well documented in a different whiny post so I won’t go into that again except to say that the lines did improve as I quilted more and below you can see the detail on one of the “suns”.

A star within the sun.

As you can see from the first photo, the quilt is finished with a sleeve and hanging on my front room wall.  I’m very happy with the result and all is right with the world tonight.  Now, on to the next one!

Still pluggin’ along…

What happens when you don’t practice, practice, practice?  You get rusty, rusty, rusty!  I’ve been away from fmq for a few weeks.  In the pursuit of my Summer List, I got out my Gettysburg Sun quit and began to quilt.  I had forgotten that I have sooo much trouble quilting a straight line.  You would think a straight line would be easy.  You would be wrong.  If I took my eye off of it for even a nano-second, the stitches were snaking all over the place!  And I just couldn’t get the “feel” of the motion.  The stitches were tiny and then they were big.  I think I can attribute some of that to “lumpy seams”…. a product of small blocks with lots of pieces.  Sometimes, I just don’t know how to press seams to eliminate the bulk in a small block.   I was very unhappy with some of the stitches…so I ripped ’em out!  I like the quilt too much to leave all of the mistakes in.  So, I ripped out stitches…even the microscopic stitches we sometimes get.  Please tell me that sometimes you have them also!  Even if you have to lie to me.  🙂

See what I mean?

Another issue I’m having is I can’t see the designs I’ve marked on dark fabrics.  I meticulously marked my dark fabrics with one of those white pencils.  I believe I wasted my time.  The marks rub off by the time I get to them.  😦  Of course, I took my time to mark the border and of course, most of the markings are gone.  Can you say frustrated?  So, I’ll get out my little stub of a white pencil and try to mark it again. How in the world do you mark dark fabrics?  Is there something out there that everyone else in the world is using except me?

Being a glutton for punishment, I decided to try a free motion feather.  Stitching in the ditch wasn’t challenging enough…I had to try swirls!  I had been drawing them for weeks with minimal success.  But at some point, I knew I would have to put down the pen and put thread to fabric.  Here’s the result.  Not too shabby.  But I suspect that birds all over the world are laughing their tail feathers off right about now!

My Summer List showed me that I am a prolific piecer but not much of a quilter.  This feather shows me that I’m a curvy, swirly quilter and not so straight arrow.  Somehow, I think that my just reflect my personality!

Post Navigation